Monday, December 29, 2008

Almond Roca

This is a great holiday or anytime treat!
Here are step by step instructions by Amy.

Almond Roca

12x15 jellyroll pan
36 saltine crackers
1 cup brown sugar
1 cup REAL butter
12 oz. chocolate chips (or white chocolate)
almonds, chopped fine

Preheat oven to 400°. Cover 12x15 cookie sheet with foil, turn foil up 1" all around.


Place crackers on foil.


In saucepan, mix together sugar and butter, and bring to a boil on MEDIUM heat. Let bubble exactly 2 minutes.


Pour and spread over crackers.


Bake 5 minutes at 400°.


Cool 1 minute, and then sprinkle chocolate chips evenly.


Let chocolate chips melt for a minute, and spread evenly over crackers.


While chocolate is still "wet", sprinkle with chopped or sliced almonds.


Refrigerate to cool completely. Break into "bark-like" pieces.


Store in airtight container and don't eat too many! :)

Monday, December 22, 2008

Chocolate Rocky Road Bark


Chocolate Rocky Road Bark
(from Family Circle 2005)

1-1/2 pounds bittersweet chocolate, chopped
6 ounces mini marshmallows
1 cup dry-roasted unsalted peanuts, coarsely chopped
1/4 pound mini chocolate-covered graham crackers (about 13 cookies), cut into bite-size pieces

1. Line a 15 x 11 x 1-inch jelly-roll pan with nonstick aluminum foil, or line pan with regular foil and lightly coat with nonstick cooking spray.
2. Gently melt chocolate in large bowl, set over saucepan of gently simmering water; stir chocolate until smooth. Remove bowl from over water and let cool slightly, about 3 minutes.
3. Stir the marshmallows, peanuts, graham crackers into the melted chocolate. Spread the mixture evenly into the prepared jelly-roll pan.
4. Place the pan in the refrigerator for 1 to 2 hours or until the bark is completely cooled.
5. Invert the bark onto a large cutting surface. Peel off the aluminum foil. Cut the bark into thirty-six 2-inch pieces.
6. Store the bark in an airtight container at cool room temperature for up to 2 weeks.

p.s. Bridget says it's also good if you add 1 cup of pretzels.

Thursday, December 18, 2008

I Spy....Something Cute!

I made these two I Spy Bags for my daughter's Kindergarten teacher last night. There are instructions all over the Internet but I followed the ones here and only made one change. Sorry the picture is not the best quality. I snapped it really fast this morning and hoped it would turn out okay.


Instead of printing the list on fabric and sewing it onto the back of the bag, I made a little loop with ribbon and used a key ring to hold a laminated picture card with the list on the back. I figured most kindergartners aren't going to be able to read the list so that's where the picture comes in handy. Just make sure to take a picture of the doo-dads before you sew them into the bag!

A fast and easy project. If you don't feel like clicking on the link above for the instructions, I copied and pasted them for you below (sometimes I hate clicking away from a page to check another one). But if you want to see step by step pictures, you better click on the link. ☺

Want to keep your kids quiet in the car? Want to keep them quiet period?? Then you have got to get one of these little bags of bliss!

They’re called I Spy bags and you’re kids will love them. They are little bean bags with a plastic window in the front. The kids read the list (or look at the pics) of items printed on the back and manipulate the bag to find the items through the window. Sheer Genius I tell you. My son loves playing I Spy when we drive but sometimes when I drive I have to pay attention ya know? So I started collecting little doodads around the house and saving some of the little things he collects (that we never have anything to do with) to put inside.

Here's what you need to make one of these.

2-8 inch squares of flannel

4 inch piece of plastic, about 4mm thick

poly-pellets used to fill dolls, found in the sewing notions section (Michaels carries these, but Joann’s and Hobby Lobby do not)

little doodads (sequin, button, paper clip, acorn, doll house items, etc)

printable fabric (I used cotton twill)


Directions:

Measure and cut with a rotary cutter a 16" (width) x 8" (height) rectangle

Iron fabric flat with 1/2 inch seam all the way around. I also folded the fabric in half and ironed the seam so I knew where to center the front window.


Find a square object (I used a post-it note box) or measure a 3" square window and trace it. Use rotary cutter to cut out.

In Word, type a list of all the items you're putting in the bag or print a picture of them. Choose your font and print a test sheet before printing on your fabric. Measure it on the back of your bag leaving about a 1" border to sew on. Once your satisfied print it out and follow the directions on the package.
I kept the test sheet, cut it out and laminated it for myself to keep in my wallet so (when I’m not driving) I can help him by reading the things off.

Cut a 4" square out of the plastic and Scotch tape it to the inside of the bag.

Sew the plastic window, I did 2 rows of running stitch and then a zig-zag around. I have a choking phobia so I wanted to make sure these puppies wouldn't bust a seam. Test first because I had to pull it out once due to the plastic sticking to the machine. I just went slowly and it was o.k.

Sew the list on the back using zig-zag stitch so it doesn't fray.

Pin edges together with right sides facing. Sew together leaving about a 2-3" opening to turn right side in and add do-dads and pellets. Flip right side out and sew zig-zag around edges to secure seams. (Remember to leave your opening!)

Add doodads and then pellets. I filled up to top of window only. You want them to be able to move the items around to find them. Only fill it up as high as you have to, I think I may add a tad bit less next time.

Sew up opening with matching zig-zag and Voila! You have your very own "I Spy…" bag!

p.s. You don't have to use flannel; I didn't. You can use almost any scrap fabric you have. You might even be able to find a piece of plastic for the window around the house too. Like those bags that comforters or pillowcases come in maybe...

p.p.s. I have also seen some done using rice instead of the poly pellets.

Monday, December 15, 2008

Reindeer Poop


Or Chex Muddy Buddies, whatever you want to call it. It's that addicting snack you can eat by the handful that my friend brought our family last night. (She called it Reindeer Poop.)

Chex Muddy Buddies

9 cups Corn Chex, Rice Chex, Wheat Chex or Chocolate Chex cereal (or combination)
1 cup semisweet chocolate chips
1/2 cup peanut butter
1/4 cup butter or margarine
1 teaspoon vanilla
1 1/2 cups powdered sugar

1. Into large bowl, measure cereal; set aside.
2. In 1-quart microwavable bowl, microwave chocolate chips, peanut butter and butter uncovered on High 1 minute; stir. Microwave about 30 seconds longer or until mixture can be stirred smooth. Stir in vanilla. Pour mixture over cereal, stirring until evenly coated. Pour into 2-gallon resealable food-storage plastic bag.
3. Add powdered sugar. Seal bag; shake until well coated. Spread on waxed paper to cool. Store in airtight container in refrigerator.

Wednesday, December 10, 2008

Change Is Good

We replaced our fall window decor with Christmas
and the kids had a lot of fun doing it.


In addition to these you could do stars, wreaths, candy canes, bells, Santa, snowflakes, etc. Have fun!

Monday, December 8, 2008


Any recipe with the word 'yummy' is a pretty good gamble and worth every bite. This one is no exception. It comes from a Country Home magazine issue. The recipe calls for a from scratch cookie but we didn't have the unsweetened chocolate squares on hand so I used the Rolo Cookie recipe (minus the Rolo's). I followed the magazine's recipe for the frosting and toppings. Yummy! ☺

Peppermint-Frosted Chocolate Yummies

1/2 cup butter, softened
1 cup granulated sugar
1 tsp vanilla
1/2 tsp salt
1 egg
2 (1-oz) squares unsweetened chocolate, melted and cooled
1 cup all purpose flour
granulated sugar

In a large mixing bowl, beat 1/2 cup butter for 30 seconds. Add 1 cup granulated sugar, vanilla and salt. Beat until combined, scraping sides of bowl. Beat in egg and melted unsweetened chocolate. Beat in flour until combined.
Drop dough by rounded teaspoons 2 inches apart onto ungreased cookie sheets. Grease the bottom of a glass and coat with granulated sugar; flatten cookies with sugar-coated glass. Bake in a 375° oven for 8 minutes or until set. Cool on cookie sheets for 1 minute; transfer to wire racks. Cool completely.

Frosting & Topping
1/4 cup butter, softened
2 1/2 cups powdered sugar
1/2 tsp peppermint extract
2-3 Tbsp milk
Red food coloring (optional)
Crushed peppermint candies (optional)
1 cup semisweet chocolate pieces
1 tsp shortening

In a medium mixing bowl, beat 1/4 cup butter for 30 seconds. Beat in powdered sugar, peppermint extract, and enough milk to make a spreading consistency. If desired, tint pink with food coloring. Spread frosting over each cookie leaving a 1/4 inch border around the edge. Sprinkle with candies if desired.
In a small saucepan, heat and stir semisweet pieces and shortening over low heat until melted and smooth. Let cool slightly. Drizzle chocolate over tops of cookies.
Makes 3 dozen cookies.

Friday, December 5, 2008

♫ Oompa Loompa ♫

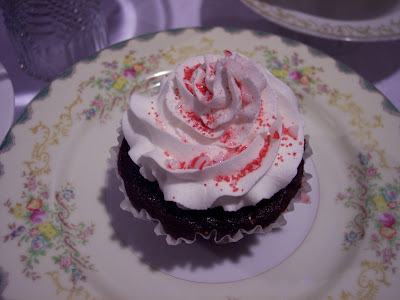
Rememeber those cake stands? Remember my vision of many, many cake stands covered with many, many cupcakes?
Well, it came to fruition on Tuesday night!

The pictures don't really do it justice but it turned out even better than I imagined.

63 cake stands, topped with 120 cupcakes was alot like walking into Willy Wonka's Chocolate Factory.


Then we gave them all away. ☺

Thursday, December 4, 2008

Christmas Cram

Before it gets too busy and there is no time to blog, here are a few holly jolly ideas from Bridget.

One for the kids...

Snowman Spoon Ornament
plastic spoon
orange and black "TULIP" paint
white felt (or craft foam)
black felt (or craft foam)
twigs
black sequins (or buttons)
fabric scrap
ribbon for hanger

Paint on face and let dry (overnight is good). Cut out white felt for body, glue it to the spoon handle. Glue ribbon to the top of the spoon for hanger. Cut out hat from black felt and glue over ribbon. Make scarf from fabric scrap to tie around neck. Glue on sequins and twig arms.


Christmas Outlet Cover
wood Christmas shape (pre-painted or not)
safety outlet cover

Paint shape if not painted. Hold up wood shape to outlet to measure where you want to glue the cover. Hot glue cover to back of shape. Plug in outlet.


Decorative Bags/Cards/Plaques
gift bags
plain cards
lunch sacks
wood pieces
Wonder-Under/Heat N Bond, etc.
fabric scraps
jingle bells
raffia
ribbons
buttons
jute string
cookie cutters (or print templates from computer or draw free hand)


Once you have cut out your fabric shapes, follow the directions for the Wonder Under or Heat N Bond from a previous post here to apply the shapes to the bag, card or wood block. Then decorate your ribbons, buttons, raffia, etc.


Monday, December 1, 2008

Oldie But Goodie


Just about everyone has had these. But maybe not. Or maybe you forgot about them.
Anyway, it is quite possibly the best cookie ever invented, and if you're like me, you don't wait until they cool. You smear one right off the wax paper while they're still warm. ☺

No Bake Chocolate Drop Cookies

1/4 cup cocoa powder
1 stick butter
1/2 cup milk
2 cups sugar
1/2 tsp salt
1 tsp vanilla
1/2 cup peanut butter
3 cups quick oatmeal

Combine cocoa, butter, milk, sugar and salt in a saucepan. Bring to a boil over medium heat. Boil 2 minutes, stirring constantly. Remove from heat and add the vanilla, peanut butter and oatmeal. Drop by spoonfuls onto wax paper and let cool completely.
Yields around 2 dozen.